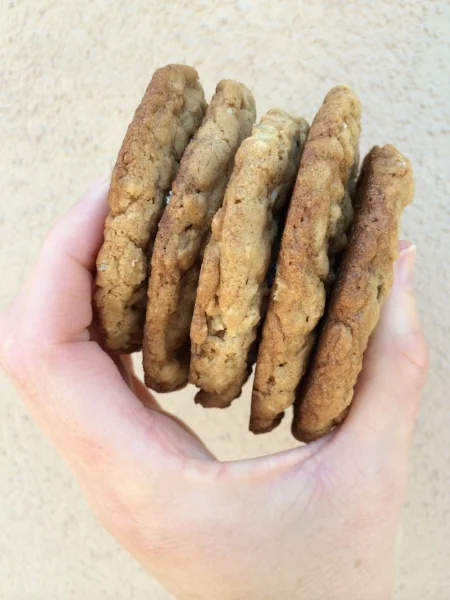
Your given a recipe for your co-worker’s husband’s great grandmother’s chocolate chip cookie and you can’t wait to try them. You get home, precisely follow the recipe, portion, bake and patiently wait. 10 minutes later, you go in for the big reveal only to find they aren’t what you thought. Whether too cakey, flat, crispy or just plain not to your preference, they come in short. Before you toss the recipe – heck, grandma worked hard for that – consider giving it another shot, but this time, with a few measured and precise modifications that even Bill Nye The Science Guy would be proud of! Here to help us reach that perfect cooking by answering all of our burning (hopefully figuratively and not literally) questions are our good friends at Betty Crocker.
Problem: My Cookies Are Too Tough
Why?
· Overworked the dough (especially likely with cutouts).
· Added too much flour.
· Used flour with too high of a protein content (e.g. bread flour).
· Didn't use enough fat or sugar in the dough.
Fix It
· Use a light touch; work with dough as little as possible once flour is added to avoid having the dough stiffen up as it is worked.
· Spoon flour into a measuring cup, rather than scooping the cup directly into the flour canister. Scooping compacts the flour, which means you end up with too much.
· Try substituting pastry flour for the all-purpose flour. Pastry flour has less protein, so it develops less gluten when worked.
· Start by adding ¼ cup extra sugar or butter to the dough. Sugar and fat are the ingredients that make a cookie tender.
Problem: My Cookies Are Hard and Dry
Why?
· Added too much flour.
· Stored cookies improperly.
· Overbaked the cookies.
· Needed more fat or sugar.
Fix It
· Spoon flour into a measuring cup, rather than scooping the cup directly into the flour canister. Scooping compacts the flour, which means you end up with too much.
· Store cookies in an airtight container; freeze them for long-term storage.
· Check oven temperature accuracy or bake a few minutes less.
· Start by adding ¼ cup extra sugar or butter to the dough. Sugar and fat are the ingredients that make a cookie tender.
Problem: My Cookies Are Too Pale
Why?
· Used an insulated cookie sheet.
· Baked at low oven temperature.
· Under-baked the cookies.
· Needed more sugar.
Fix it
· Use a heavy dull-aluminum cookie sheet. It allows heat to melt the sugar and brown the cookie.
· Increase temperature by 25 degrees. Extra heat helps cookies brown.
· Bake a couple of minutes longer.
· Start by adding ¼ cup extra sugar to the dough. Sugar is a key ingredient for browning cookies.
Problem: My Cookies Are Too Crusty
Why?
· Added too much sugar.
· Overbaked the cookies.
· Used a dark cookie sheet.
Fix it
· Cut back sugar by ¼ cup or use brown sugar (which has more moisture) as a substitute.
· Check oven temperature accuracy, bake a few minutes less, or reduce temperature by 25 degrees.
· Use a heavy dull-aluminum pan.
Problem: My Cookies/Bars Are Too Gummy
Why?
· Added too much liquid/moisture.
· Under-baked the cookies/bars.
· Used too small a pan.
Fix it
· Decrease egg amount (use yolk instead of whole egg or use 1 less egg) or add some flour.
· Bake a couple of minutes longer. Cookies are done when the edges are firm. Bar cookies typically are done when a toothpick inserted into the center of the pan comes out clean.
· Make sure you're using the pan size called for in the recipe. A smaller pan will make the batter too thick for the designated baking time.
Problem: My Cookies Are Too Dark
Why?
· Used a dark pan.
· Added too much sugar.
· Overbaked the cookies
Fix it
· Use a heavy dull-aluminum pan.
· Cut back by about ¼ cup sugar to prevent overbrowning.
· Check oven temperature accuracy, bake a few minutes less, or reduce temperature by 25 degrees.
Problem: My Cookies/Bars Are Too Crumbly
Why?
· Added too much flour.
· Dough needs more fat.
· Didn't let cookies cool long enough.
Fix it
· Cut back by ¼ cup flour to start.
· Spoon flour into a measuring cup, rather than scooping the cup directly into the flour canister. Scooping compacts the flour, which means you end up with too much.
· Add 2 to 4 tablespoons more fat to the dough. Fat makes cookies tender.
· Be patient and let bars cool completely before cutting, or cool cookies a couple of minutes longer.
Problem: My Cookies Are Too Flat
Why?
· Added too much fat or sugar.
· Used all butter.
· Baked at a low oven temperature.
· Used room temperature/soft dough
· Used a warm pan.
Fix it
· Use half butter and half shortening, or reduce sugar amount. Butter and sugar make cookies spread.
· Check oven temperature accuracy, bake a few minutes more, or increase temperature by 25 degrees.
· Chill dough before using.
· Place dough on cooled, clean pans to prevent early spread of cookies.
Problem: My Cookies Brown Unevenly
Why?
· Made cookies with random, inconsistent sizes or thicknesses.
· Baked cookies in an oven with inaccurate oven temperatures.
Fix it
· Use a cookie scoop to help make sure all cookies are the same size. Make sure cut-out cookies are the same thickness.
· Check oven temperature accuracy with an oven thermometer.
Problem: My Cookies Always Burn
Why?
· Overbaked the cookies.
· Used a dark pan.
· Added too much sugar.
Fix it
· Check oven temperature accuracy, bake a few minutes less, or reduce temperature by 25 degrees.
· Use a heavy dull-aluminum pan.
· Reduce sugar amount to prevent overbrowning.
Problem: My Cookies Are Stuck to the Pan
Why?
· Forgot to grease/line
· the cookie sheet or pan.
· The cookies are delicate and contain a lot of sugar.
Fix It
· Lightly grease cookie sheet or line with parchment paper.
· Line pans for bars with lightly greased or non-stick aluminum foil.
Problem: My Cookies Are Too Stiff
Why?
· Added too much flour.
· Baked dough immediately after it had removed from the refrigerator/freezer.
Fix It
· Cut back by ¼ cup flour to start.
· Spoon flour into a measuring cup, rather than scooping the cup directly into the flour canister. Scooping compacts the flour, which means you end up with too much.
· Bring the dough to room temperature before baking.
For other terrific tips and hundreds of recipes, including dozens of cookie recipes like my brown butter gingersnap cookie, salted oatmeal coconut chocolate chip, espresso chocolate chip, thyme cornmeal cookies, and of course my ultimate chocolate chip cookie recipe, visit my website (thetabletogether.com). While there, consider “subscribing” and I will send a new tip or blog post directly to your inbox every Tuesday and Wednesday morning!
P.S. Make sure you check out my YouTube channel, The Table Together with Tiffany Lewis, for dozens of videos solely dedicated to bringing all of these fantastic tips and recipes to life!
Cheers to starting a new tradition around The Table Together!
Sincerely,
Tiffany Lewis
Founder and true believer in the power of bringing people around The Table Together!